Adding a layer using the WFS protocol
The Web Feature Service (WFS) is one of the OGC standards (http://www.opengeospatial.org) which is included in the list of standards (of this type) that gvSIG supports.
WFS is a communication protocol via which gvSIG retrieves a vector layer in GML format from a supporting server. gvSIG retrieves the geometries and attributes associated to each "Feature” and interprets the contents of the file.
Go to the “Add layer” and then select the WFS tab.
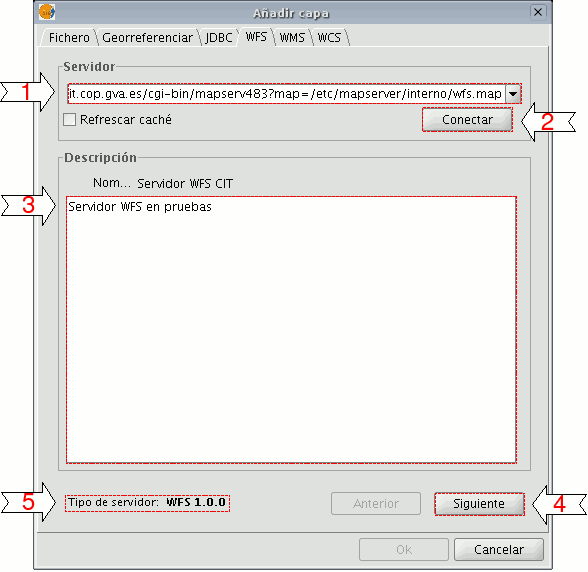
1. The pull-down menu shows a list of WFS servers (you can add a different server if you don’t find the one you want).
2. Click on “Connect”. gvSIG connects to the server.
3. and 4. When the connection is made, a welcome message from the server appears, if this has been configured. If no welcome message appears, you can check whether you have successfully connected to the server if the “Next” button is enabled.
5. The WFS version number that the server you have connected to is using is shown at the bottom of the box.
N.B. You can select the “Refresh cache” option which will search for information from the server in the local host. This will only work if the same server was used on a previous occasion.
Click on “Next” to start configuring the new WFS layer.
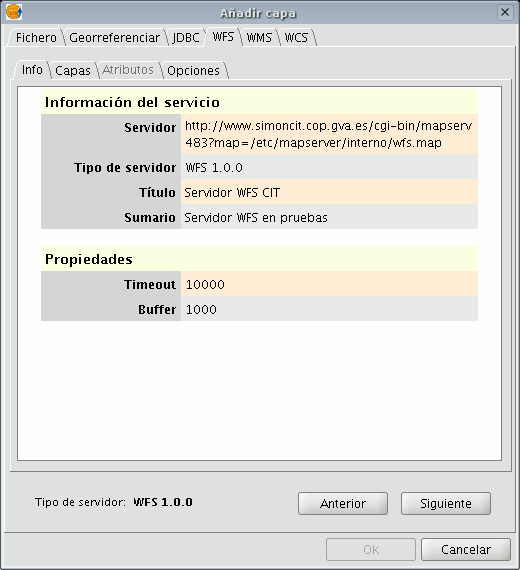
When you have accessed the service, a new group of tabs appears. The first tab (“Information”) shows all the information about the server and about the request that is to be sent. This information is updated as more layers are selected.
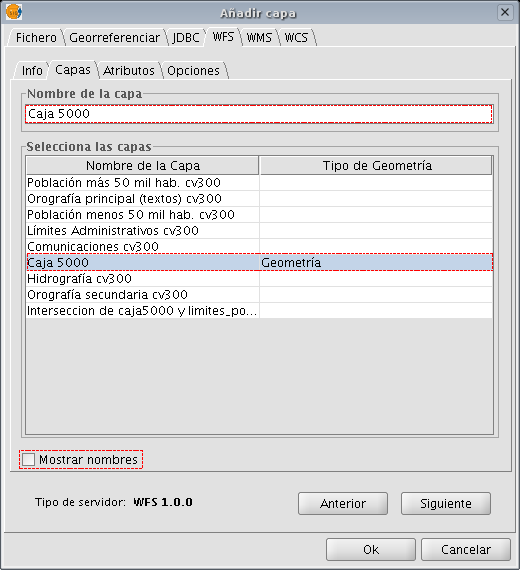
The “Layers” tab can be used to select the layer you wish to load. A two-column table appears in which the layer name and the geometry type are shown. As the geometry type is obtained by clicking on the layer (it needs to be obtained from the server), this column is completely blank at the start.
The “Show layer names” option shows the name of the layer as it is recognised by the server and not by its description, which is what appears in the table by default.
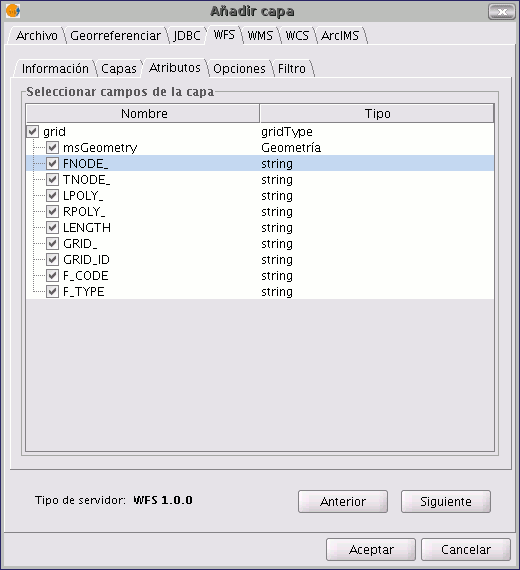
The “Attributes” tab allows the fields (or attributes) of the selected layer to be selected. When the layer is loaded, only the fields that have been selected are retrieved.
To select the attributes, enable the check box which appears to their left.
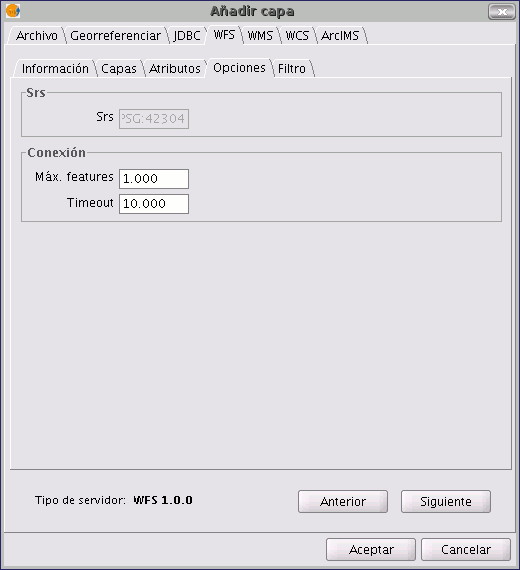
The "Options” tab shows information about user authentication and the connection. The “User” and “Password” fields are used in the WFS-T to be able to identify a user in the server so that writing operations can be carried out (not yet implemented).
The connection parameters are:
Number of features in the buffer, i.e. the maximum number of elements that can be downloaded.
Timeout. This is the length of time beyond which the connection is rejected as it is considered to be incorrect. If these parameters are very low, a correct request may not obtain a response.
The Spatial Reference System (SRS) is another important parameter. Although this cannot currently be changed, it is hoped that this will be possible in the future. In any case, gvSIG reprojects the loaded layer to the spatial system in the view.
You can use this tab to apply filters to your WFS layers. Click on the “Filters” tab in the window.
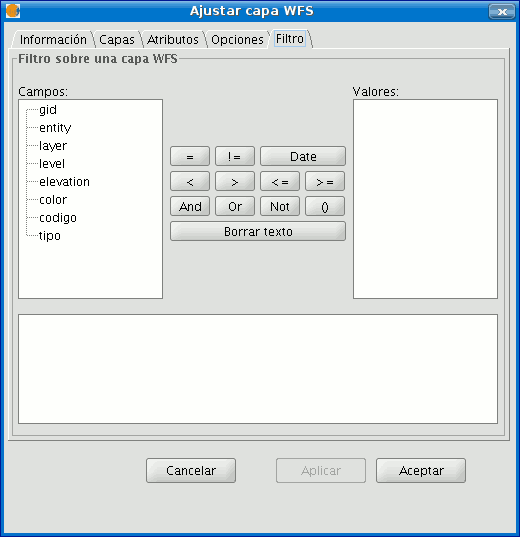
The “Fields” text box shows the layer’s attributes which can be used as a filter. Click on the selected field to see its values.
When the layer is loaded for the first time, the values in the column cannot be selected. However, if you have a filter sentence for the layer you can apply it in the filter text area and the filtered layer will be loaded directly.
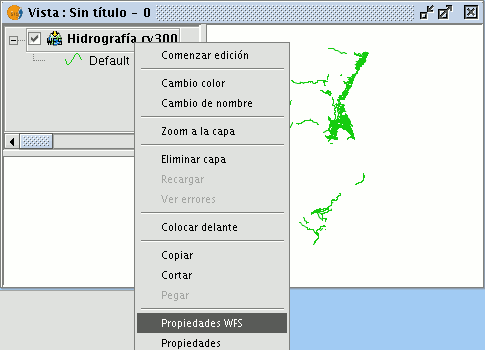
If you do not have a filter sentence, load the WFS layer into the ToC, then right click on the mouse and select the “WFS properties” option from the contextual menu.
To create the filter for the WFS layer, double click on the field you wish to use as a filter and it will appear in the bottom text area. Then click on the operator you wish to apply and finally select the value in the “Values” text area by double clicking on it.
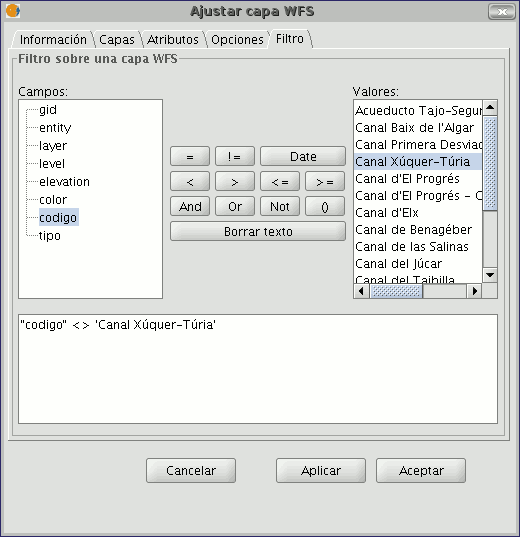
When you have created the required filter, click on “Ok” and it will be applied to the WFS layer.
When all the parameters have been configured, click on “Ok”. The layer will be loaded into a gvSIG view.
By right clicking on the layer, its contextual menu appears. If the “WFS Properties” option is selected, an option display opens (similar to the “Add layer” display). This can be used to select new attributes and other layers and change the layer’s properties.

In gvSIG 1.9 a new 'Area' tab was added which allows the user to filter the requested WFS layer geometries according to a bounding box. The user enters the coordinates of the required display area so as to optimize access to the data layers and to save time when viewing them.
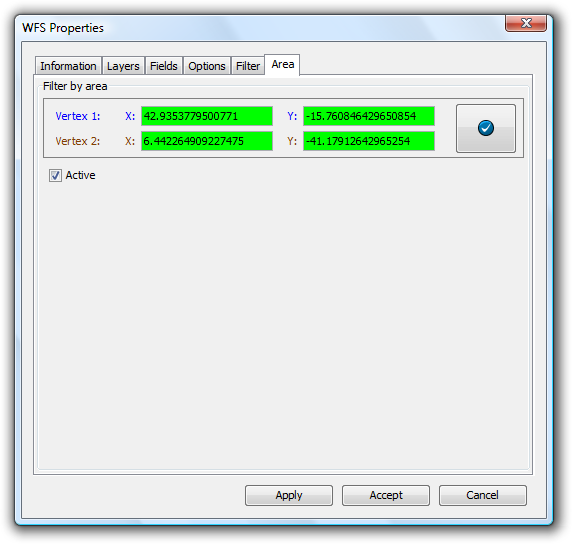
Loading a WFS layer - The Area tab
